 by
by Effective shot put technique is built on balance, speed, and a powerful transfer of force from the legs and hips through the torso into the shot. The arm does not simply throw the implement forward. Instead, the athlete creates momentum across the circle, reaches a stable power position, and finishes with a fast, controlled release.
This approach applies to school athletics, club competition, and organised track and field in Nigeria. Before training, check the shot weight, circle markings, landing sector, and competition rules used by your event.
Shot put fundamentals and starting position
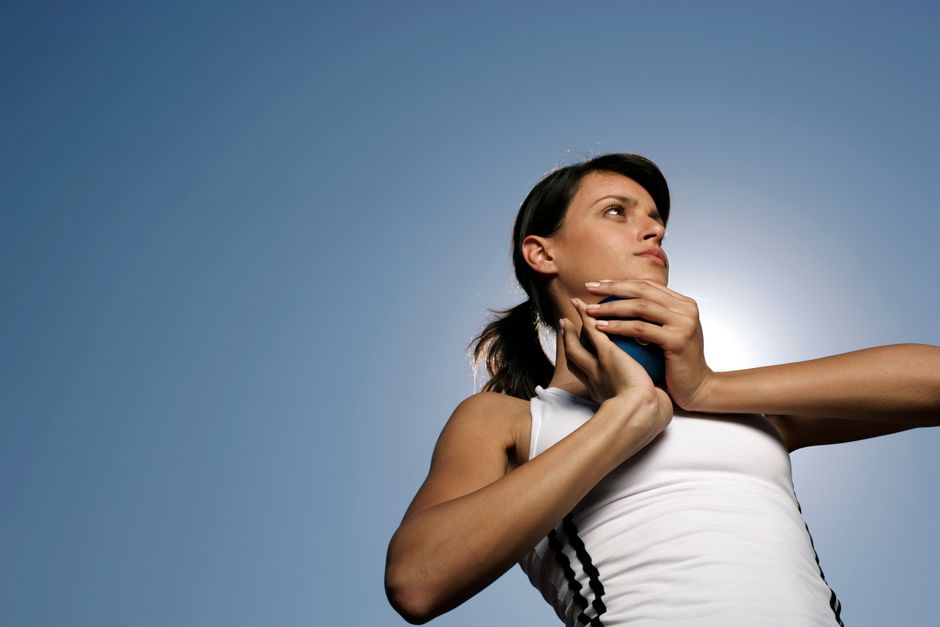
Hold the shot against the base of the fingers rather than deep in the palm. Spread the fingers comfortably behind it, keep the thumb below or beside the shot for support, and press it firmly against the neck below the jaw. The elbow should point slightly outward, not hang directly beneath the hand.
In the basic standing throw, face the side or rear of the throwing sector with the feet about shoulder-width apart. Bend the knees, keep the chest balanced over the legs, and place most of the body weight over the leg nearest the back of the circle. The non-throwing arm should remain relaxed and help maintain balance.
A strong shot put starting position allows the lower body to begin the movement. Avoid lifting the shot away from the neck, collapsing the chest, or placing all the weight on the toes. The body should feel coiled but stable.
How to perform the standing shot put throw
The standing throw is the best place to learn release mechanics and the correct sequence of movement.
- Load the back leg: Bend the rear knee and keep the hips loaded while the shoulders stay turned away from the sector.
- Drive from the ground: Push through the rear foot and rotate the hips toward the front of the circle.
- Separate the upper body: Let the hips begin before the shoulders and throwing arm. This separation stores useful elastic energy.
- Block with the front side: Brace the front leg and keep the non-throwing side firm as the hips and chest move forward.
- Finish the push: Extend the legs, rotate the trunk, and punch the shot away from the neck. The elbow stays behind the hand until the final action.
- Recover under control: After release, reverse the feet or move across the circle without stepping on the toe board.
The shot should leave the fingers through a pushing action, not a baseball-style throw. A useful shot put release angle is often around 35 to 40 degrees, although the best angle varies with release height, speed, and the athlete’s strength. Chasing a high angle while losing release speed usually reduces distance.
Glide technique versus rotational shot put technique
The two main approaches are the glide shot put technique and the rotational shot put technique. Both aim to deliver the athlete into the same power position: the throwing side loaded, the hips ready to drive, and the front side prepared to block.
Glide technique
In the glide, the athlete begins facing away from the sector, bends over the rear of the circle, and moves across it in a low, controlled position. The rear foot travels toward the centre, followed quickly by the front foot. The athlete then lands in the power position and completes the throw.
The glide is often easier to teach first because it uses a relatively direct movement and gives athletes fewer turning phases to control. The main technical priorities are staying low, moving quickly across the circle, and landing balanced rather than jumping upright.
Rotational technique
The rotational method uses a turn across the circle to create more horizontal speed before the final delivery. It requires precise footwork, body control, and timing. The athlete must keep the shot connected to the neck while rotating and must avoid allowing the shoulders to open too early.
Rotation can be effective for experienced throwers, but extra movement does not automatically produce a longer throw. An athlete who loses balance, drifts away from the centre, or arrives late in the power position may throw farther with a simpler glide.
Power position and release mechanics
The shot put power position is the moment before the final delivery. The throwing foot is under or near the hip, the front foot is planted toward the sector, and the hips are turned more open than the shoulders. The shot remains tight to the neck, with the throwing elbow behind the shot.
From this position, think “legs, hips, chest, arm” rather than “arm first.” The rear leg drives, the hips rotate, the torso follows, and the arm finishes the movement. The front side must provide a firm block without locking the knee so aggressively that balance is lost.
Keep the head and eyes steady during the delivery. Pulling the head away from the shot can cause the chest to fall backward and reduce the force transferred into the implement. At release, the arm should be long and the fingers should finish behind the shot.
Common shot put technique errors
- Throwing with the arm: An early arm action usually wastes the force created by the legs and hips.
- Dropping the shot: Moving the shot away from the neck creates a long, weak path and can violate competition rules.
- Standing upright in the glide: Rising too soon reduces horizontal speed and makes the landing unstable.
- Opening the shoulders early: The shoulders should stay closed long enough for the hips to lead the delivery.
- Jumping through the release: A powerful throw still needs a firm front-side block and controlled balance.
- Ignoring the recovery: Stepping onto or over the toe board after release results in a foul, even if the throw is long.
Drills to improve shot put form
Use drills that isolate one part of the movement before combining the full technique. Start with light medicine balls or appropriate training implements when learning a new movement, and increase load only when form remains consistent.
- Standing put: Practise hip drive, front-side blocking, and the push from the neck without a glide or turn.
- Power-position holds: Pause in the loaded position, check the feet and shoulder alignment, then complete a controlled delivery.
- South African drill: Begin with a partial turn and finish in the power position. This connects movement across the circle with the final throw.
- Glide-to-power drill: Practise the glide without releasing the shot, focusing on a low movement and a balanced landing.
- Medicine-ball chest pass: Develop explosive extension through the legs and trunk while keeping the movement similar to a push.
Record throws from the side and from behind the circle when possible. Video can reveal an early arm action, a weak front-leg block, or a release that is too low. A coach should also check that drills match the athlete’s age, strength, and competition experience.
Training safely for a longer throw
Shot put combines high force with fast movement, so warm up the ankles, knees, hips, trunk, shoulders, and wrists before throwing. Begin with mobility and rehearsal movements, then use progressive throws before full-effort attempts.
Strength training should support the movement rather than replace it. Squats, split squats, deadlift variations, presses, rows, medicine-ball throws, and rotational exercises can all be useful when coached correctly. Leave enough recovery between high-intensity throwing sessions, particularly when using a heavy competition shot.
Always throw into a clear sector and retrieve implements only after the coach or official gives permission. In school or club settings, a marked landing area and clear communication are essential.
Shot put technique questions
Which shot put technique should a beginner learn first?
Most beginners should start with the standing throw, then progress to a partial movement and the glide. This builds release control and the power position before adding speed or rotation.
Should the shot be thrown or pushed?
The shot should be pushed from the neck. The legs and hips create most of the movement, while the arm completes a fast extension. A long, loose throwing action usually reduces control and may break the rules.
What makes a shot put throw go farther?
Distance depends mainly on release speed, release height, release angle, and the efficiency of the movement. Improving the sequence from ground force to hip rotation to arm extension is usually more valuable than simply trying to throw harder.
Is the glide or spin better?
Neither is automatically better for every athlete. The glide is often easier to stabilise, while the rotational technique can create considerable speed when the footwork is reliable. Choose the method that produces a repeatable power position and legal throws.